


Sovereign AI
Background
Sovereign AI, or private AI, is simply running AI on infrastructure owned by the individual or entity running it; no 3rd party access to data. Whether for privacy, cloud cost, or curiosity, setting up a usable AI infrastructure can be done in a cost effective way. For me it is all three to some degree or another … that and I just really like owning hardware. Although I’ve always enjoyed computer hardware, this stance seems time. Privacy concerns rise across the globe for various reasons including AI privacy and security. These concerns are not unfounded, especially in the consumer space where all the data entered into a chat is subject to use for training in most circumstances. That being said, despite the data collection business where consumer privacy is not their primary concern to the extent the data can be monetized, there is a focus on security. From my perspective the security risk is less about the actions and safeguards, and more about the fact we are in a sense in the wild west of AI. AI, specifically the rise of the LLM, is still new territory which means the tried and true security best practices don’t exist yet. This knowledge comes from trial and error, while ideally the ‘error’ portion of that comes from controlled circumstances like red teaming, the reality of things is that it is not possible to catch all of the attack vectors in a test environment.
User Experience
I use ollama to run models locally. It’s super quick and easy to install, download and run models, and setup a server. This is really just a few commands for each. I use OpenWebUI which can be quickly set up with docker. The linked page has docker commands to get up and running. I will post my docker-compose yaml below. I’ve found I can run up to 30b parameter models generally with no noticeable lag. The main difference is that the larger models take a little longer to load into memory before the first response. Once it is loaded, responses populate immediately. Idle GPUs don’t produce significant heat or consume excessive power, which means when not running a query or having a conversation this doesn’t perform wildly different from the server before GPUs have been added.
I can load the web ui on my phone or browser, and I can access it when I am away using my SOHO router (out of scope of this post). OpenWebUI will save conversation threads just like Gemini or ChatGPT, and switching models is quick and easy at the top of the page. Advanced parameters such as Top K (and many others) are adjustable under settings on the top right. While the models I run models are smaller than the premier services, there are not a lot of things that I can’t do on my private server by comparison. As long as the chosen model supports it, pasting or creating images is not out of the question. Although, I have not had great success with image creation on any service. The models do not have as up to date information as say Gemini, but the last update info is listed on the ollama page, so there is even an element of control here.
Hardware Setup
Server
Hardware is the first layer to consider. I decided to go with used enterprise hardware vs consumer. Despite multi-thousand dollar price tags for new server hardware, refurbished can be purchased for hundreds. New consumer hardware for running AI would cost around $2k. I found a great deal on a server (Dell R720) a few years back, and I decided to get a 2U with the thought that I might one day want to add GPU for AI. After experimenting with running ollama on CPU only, lo and behold that day has arrived.
GPU
Picking out GPU was not a straight forward as I though. Everything is redundant in servers including the space for GPU. I first looked at consumer GPUs due to familiarity and cost, and considered adding a single GPU vs redundant GPUs. However, after some conversations with AI it became clear that consumer GPUs are really not designed for, and for cooling reasons can’t be installed in servers without heavy modifications.
NVIDIA vs AMD
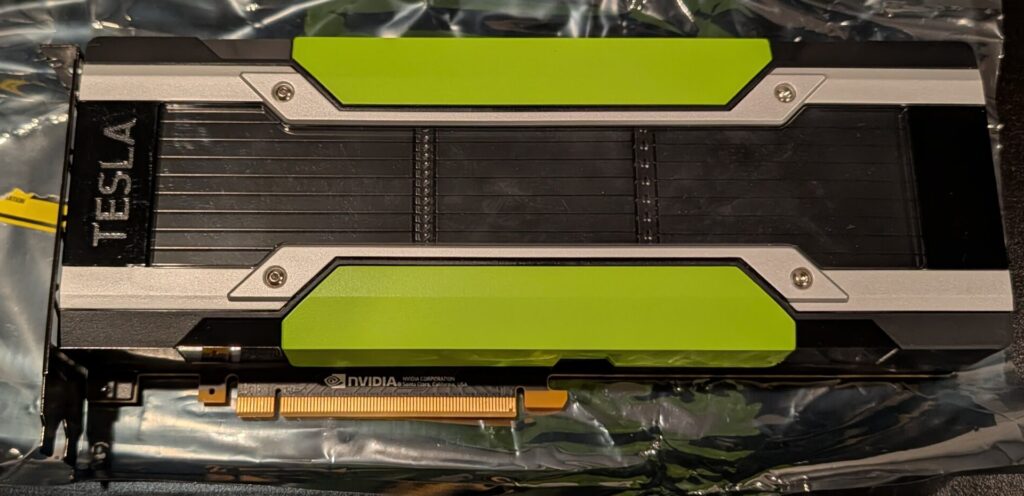
Clearly NVIDIA is the GPU giant, but is that necessary for a home lab? Turns out the biggest barrier to considering AMD Radeon is not actually the hardware itself but the development kit. CUDA is the development kit for NVIDIA and because they have so much of the market, that is what most AI projects/ applications are built around. That’s not to say that there aren’t work around or even that most project wouldn’t run, it’s more that it presents a potential additional layer of challenges to overcome. For a home lab, I will be relying on open source projects and I really want to have the most compatible ecosystem so I can experiment with as many different projects as possible. To sum up, choosing GPU isn’t entirely about hardware. OK, so I don’t have the budget for A100s. I looked for slightly older more affordable server GPUs, AI suggested looking at the NVIDIA Tesla P40 with 24G of memory each. This is another advantage of server GPU, the high end of consumer GPU comes with 16G memory. Ideally AI models are loaded into memory before running so that big memory is critical for running larger models and training. The P40s turned out to be what I went with. Refurbished they were priced about $100 under the consumer cards I was looking at and I found a sale for another $100 ish of that and ordered two. #success
Parts
Anyone who has upgraded a tower will know that GPU is not the only thing to buy with a hardware upgrade. Power supplies, riser card, different heat sinks for the CPUs, thermal paste and connector wires.
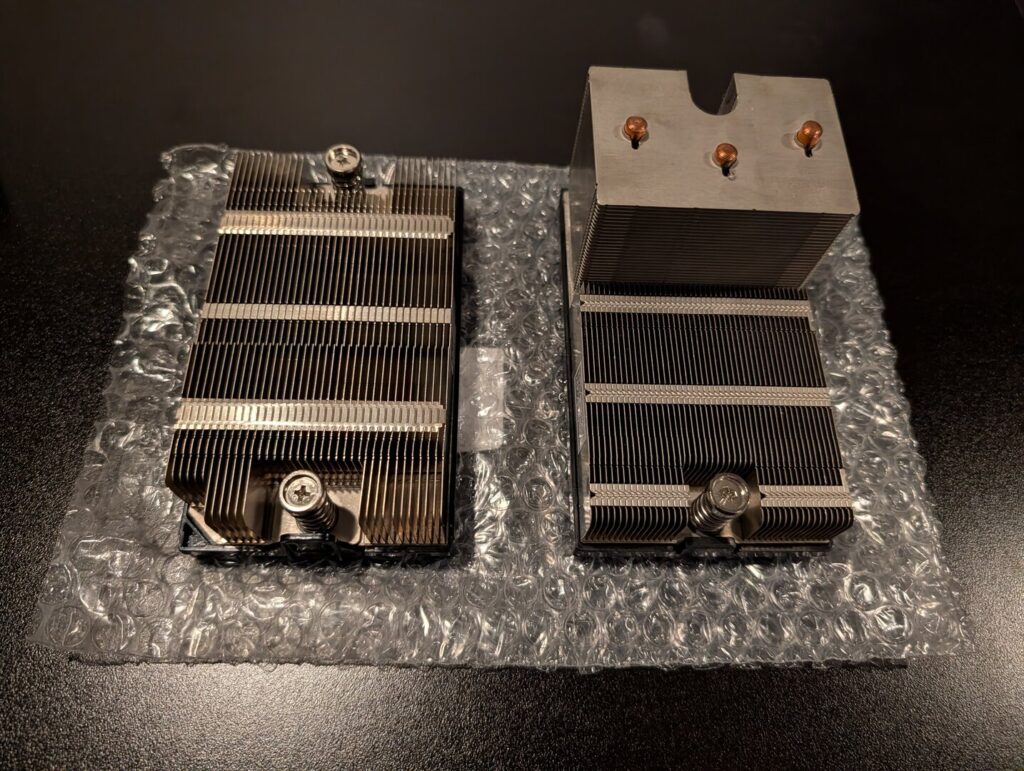
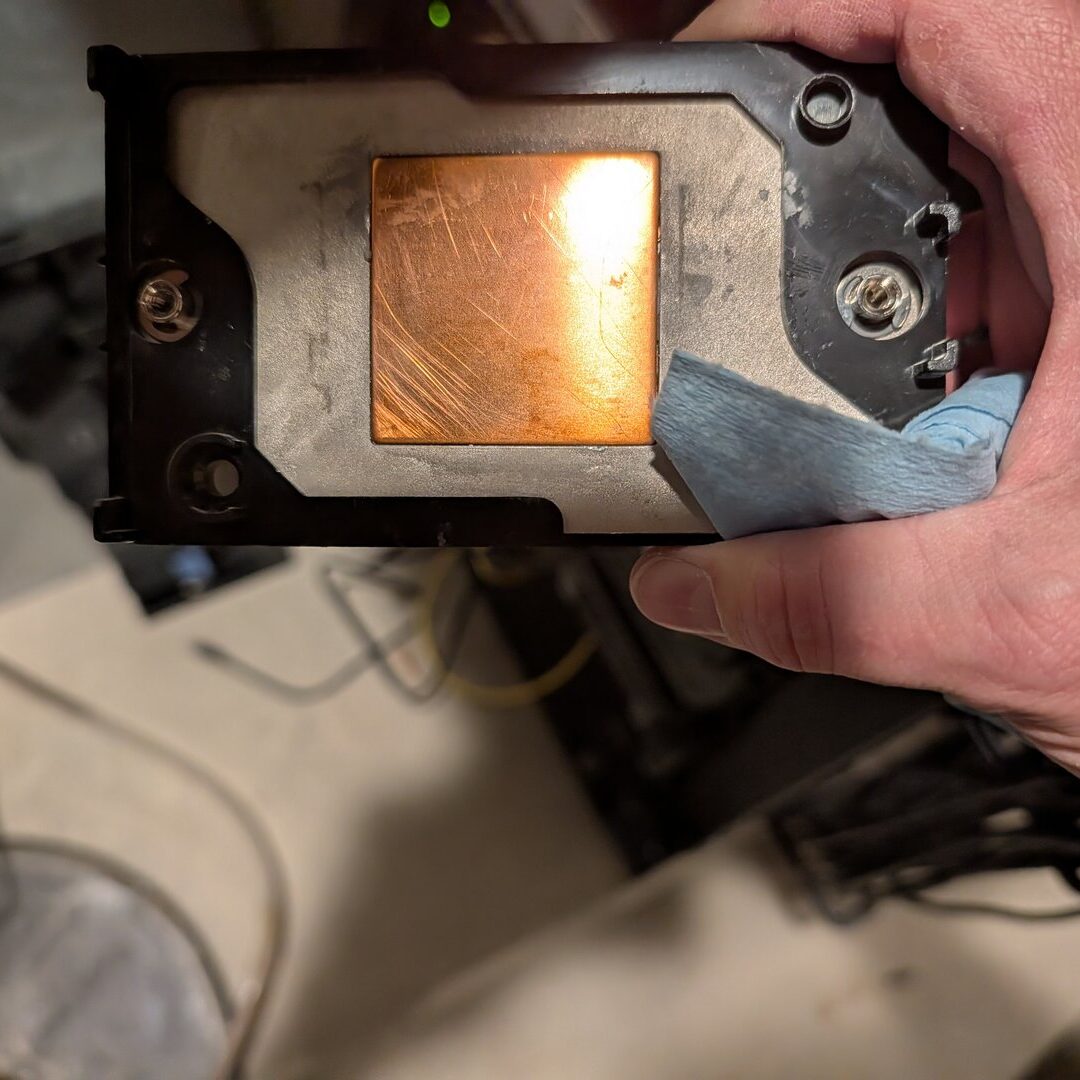
I messed up and bought the wrong heat sinks the first time. Realizing this when looked exactly like the ones I had I found myself in a scavenger hunt on the internet because these were not as easy to find. The low profile heatsink allows for better airflow and cooling of the GPUs. Despite the size difference, the low profile heat sinks are actually rated for a few degrees higher than the originals.
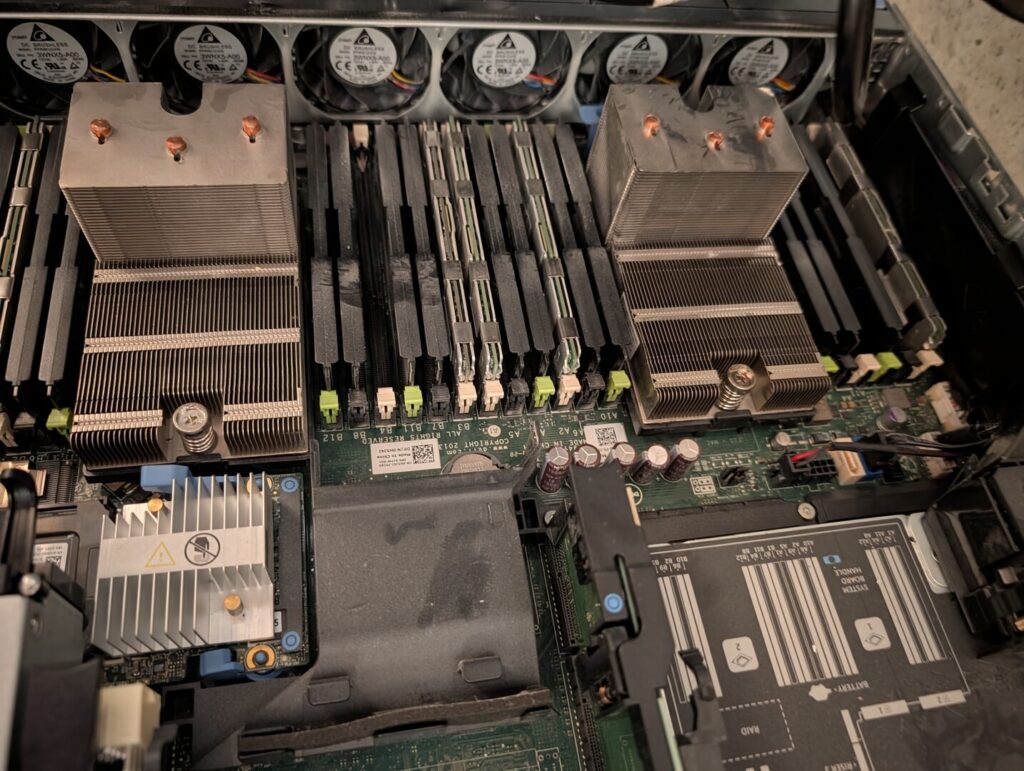
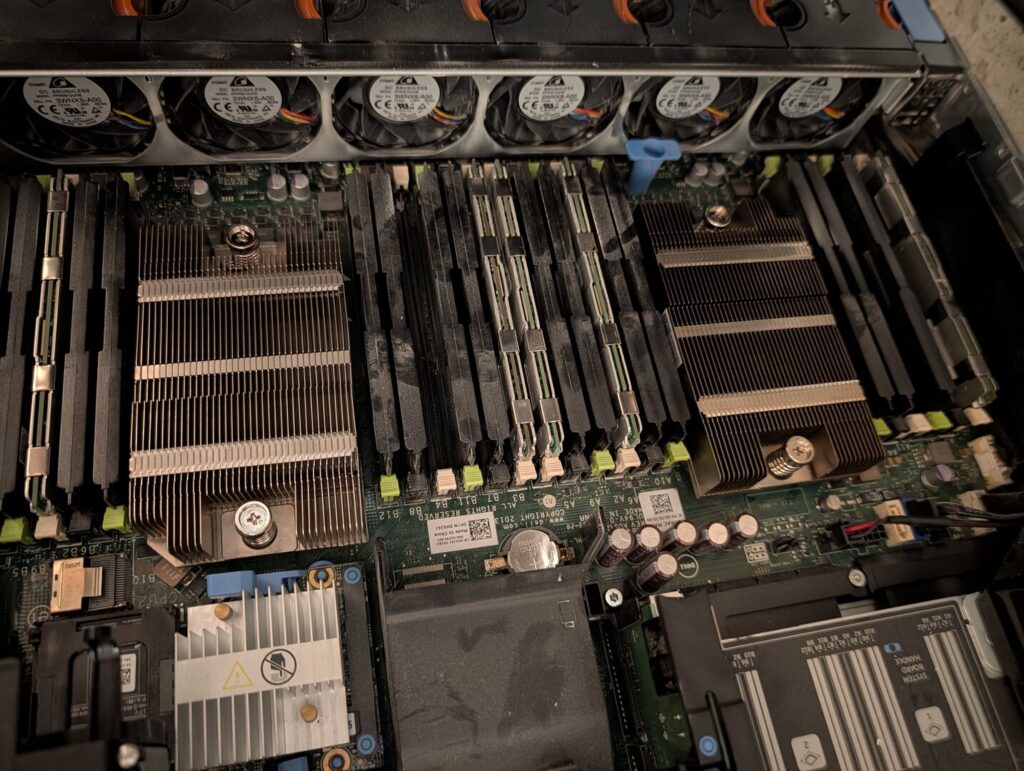
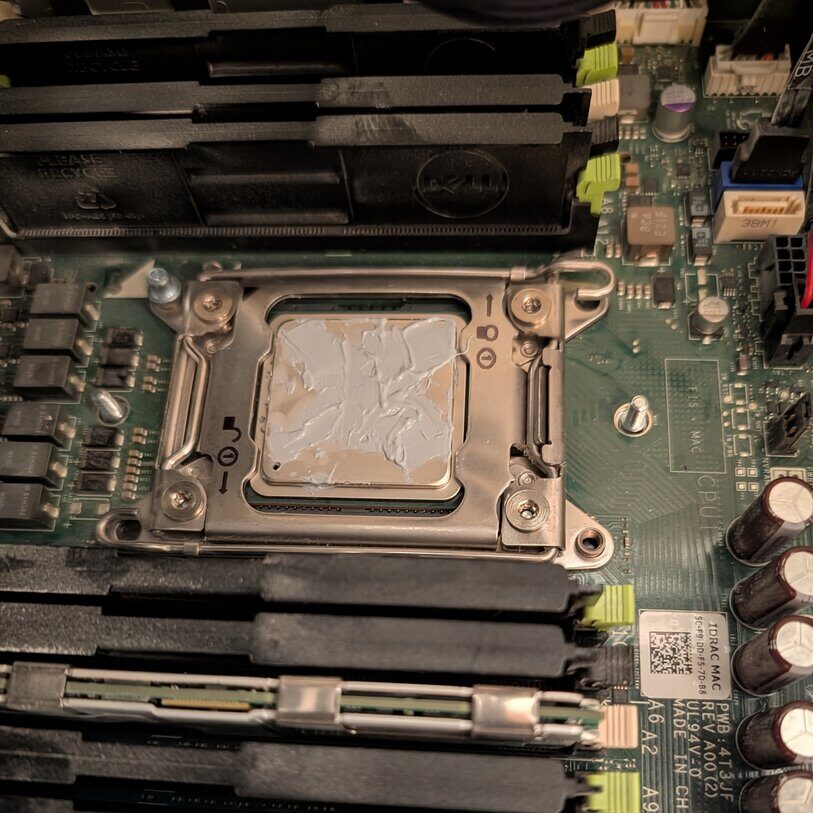
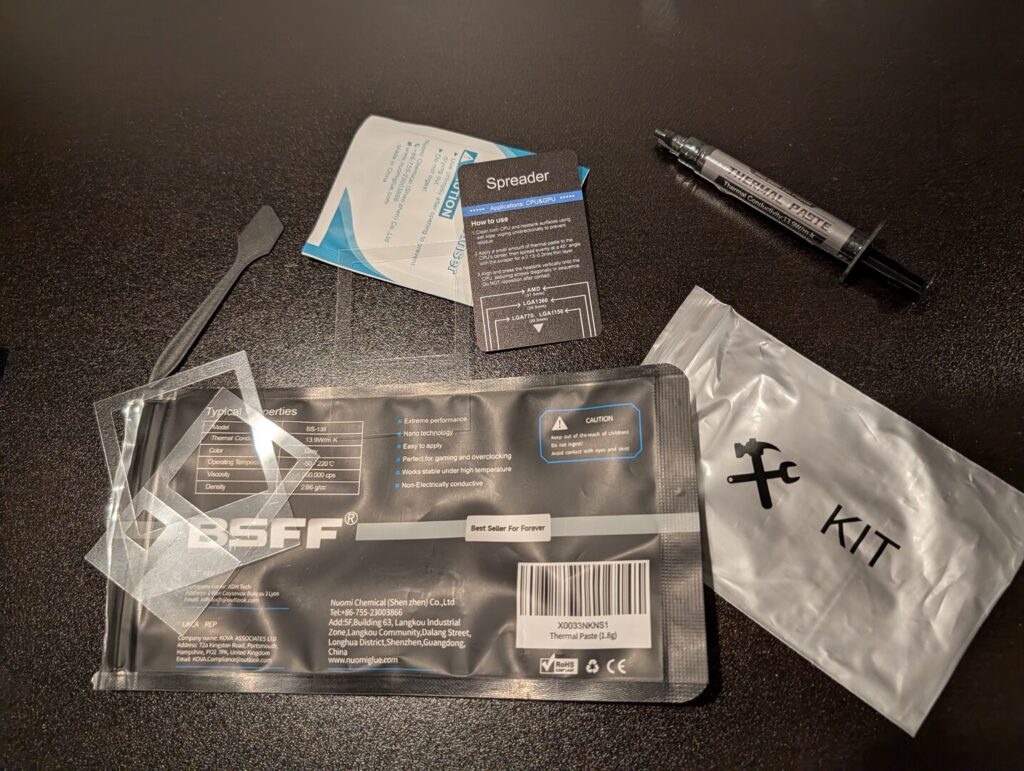
As with any heat sink replacement I cleaned and reapplied thermal paste to the CPU & heat sinks.
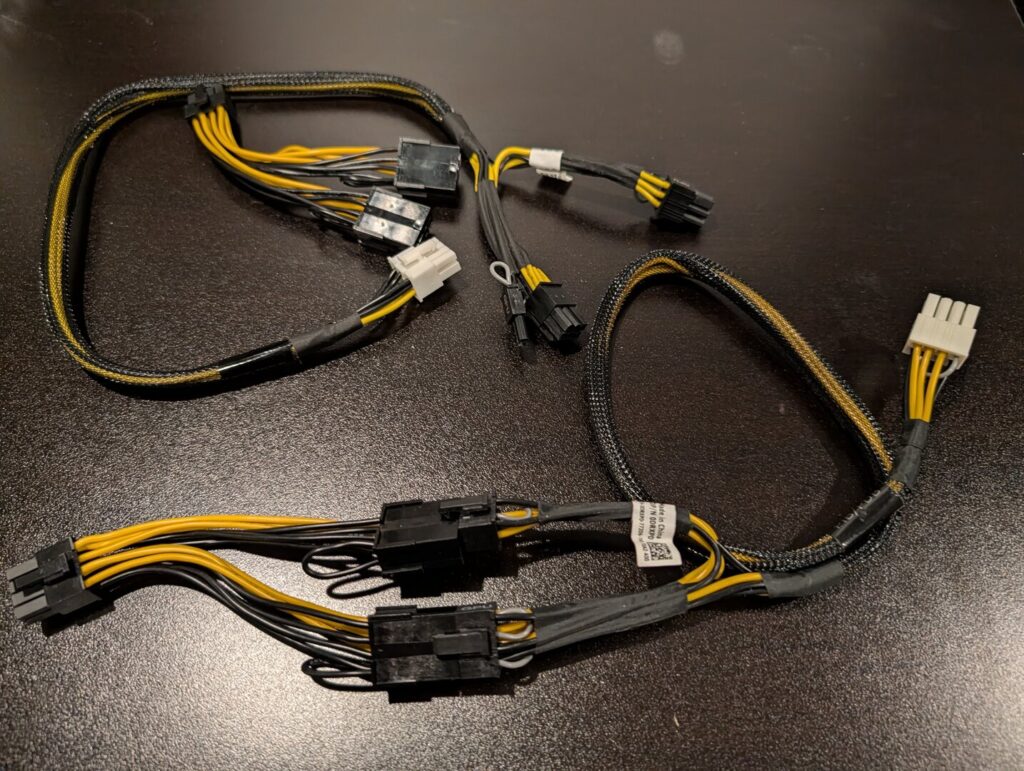
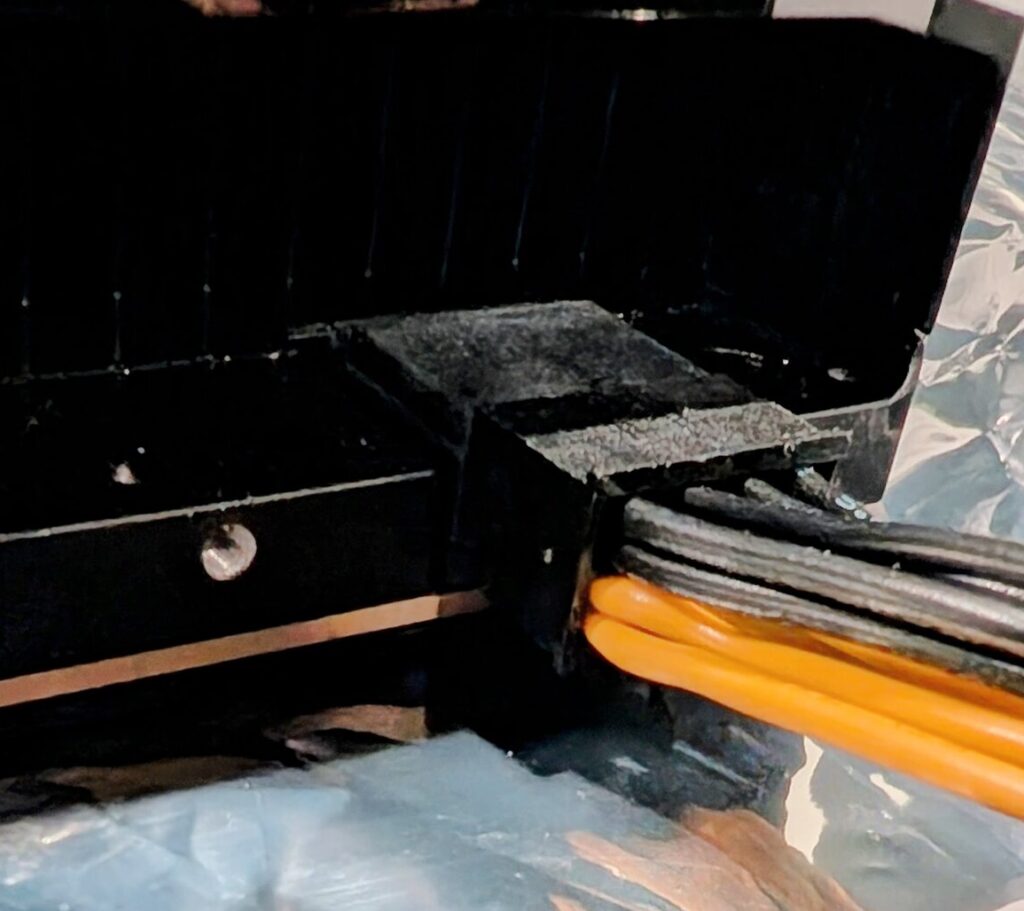
The other part that was not straight forward was the connection cables. I actually needed 2 connection cables to get the proper ends an polarity. I paid close attention to the cables that were required because the server has the opposite polarity that the cards require which means the cables need to swap that before it gets to the card, otherwise the cards would fry.
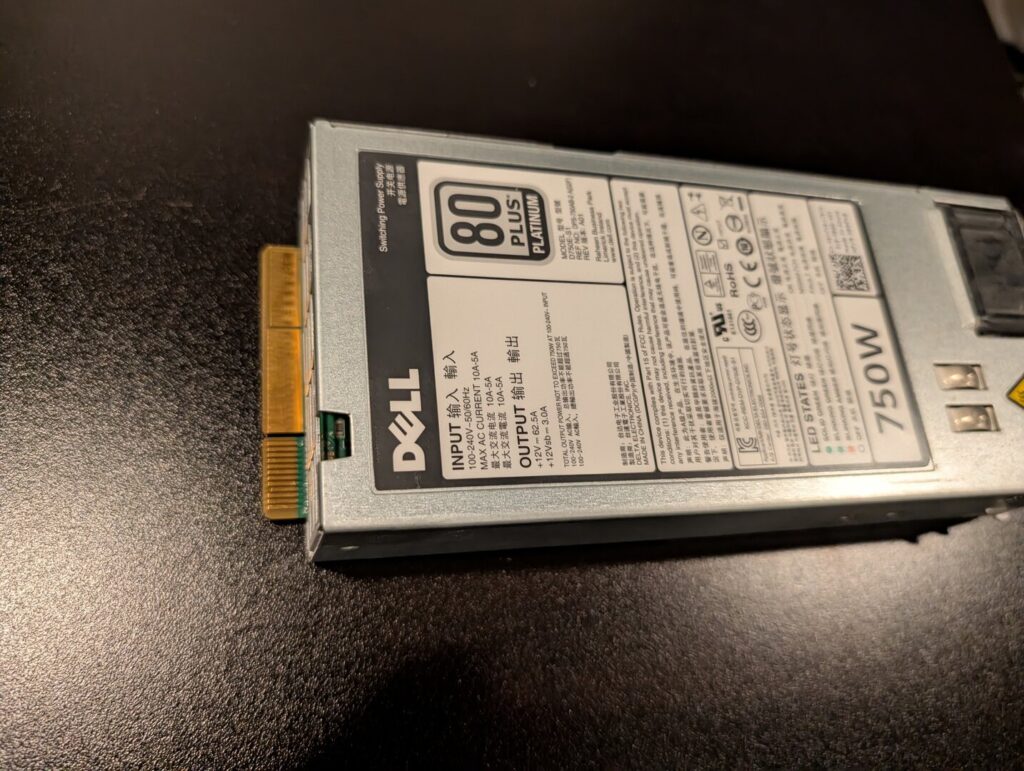
The power supplies needed to be upgraded. There is a orange latch on the back which allows the power supplies to slide out the back and insert the new ones.
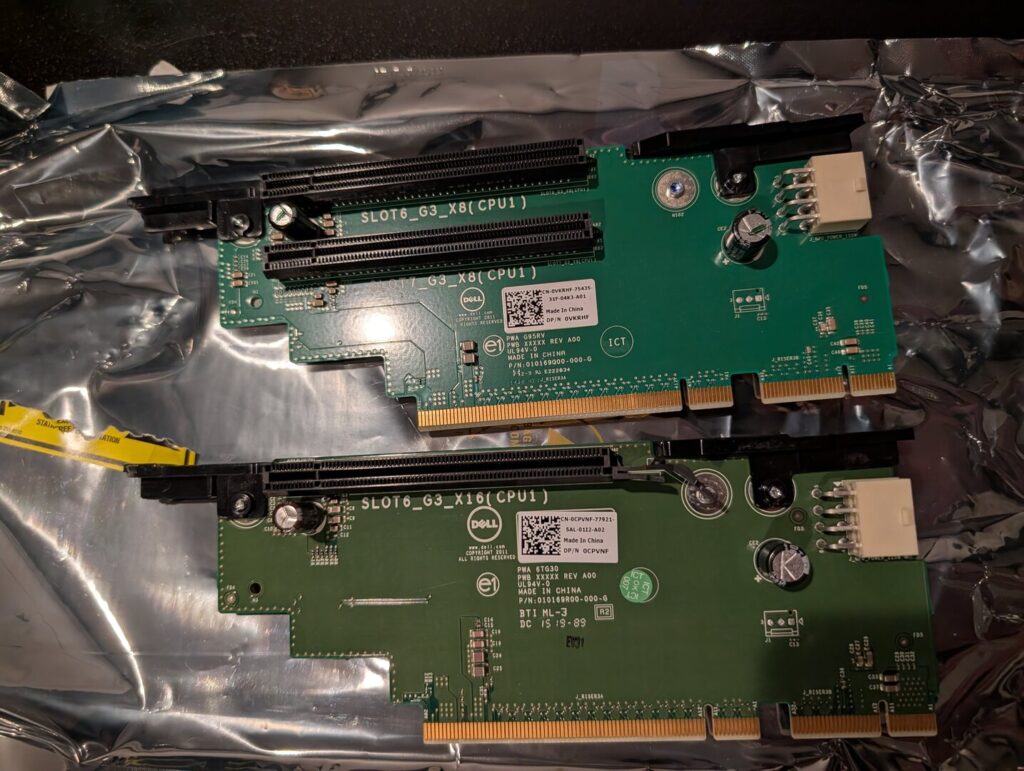
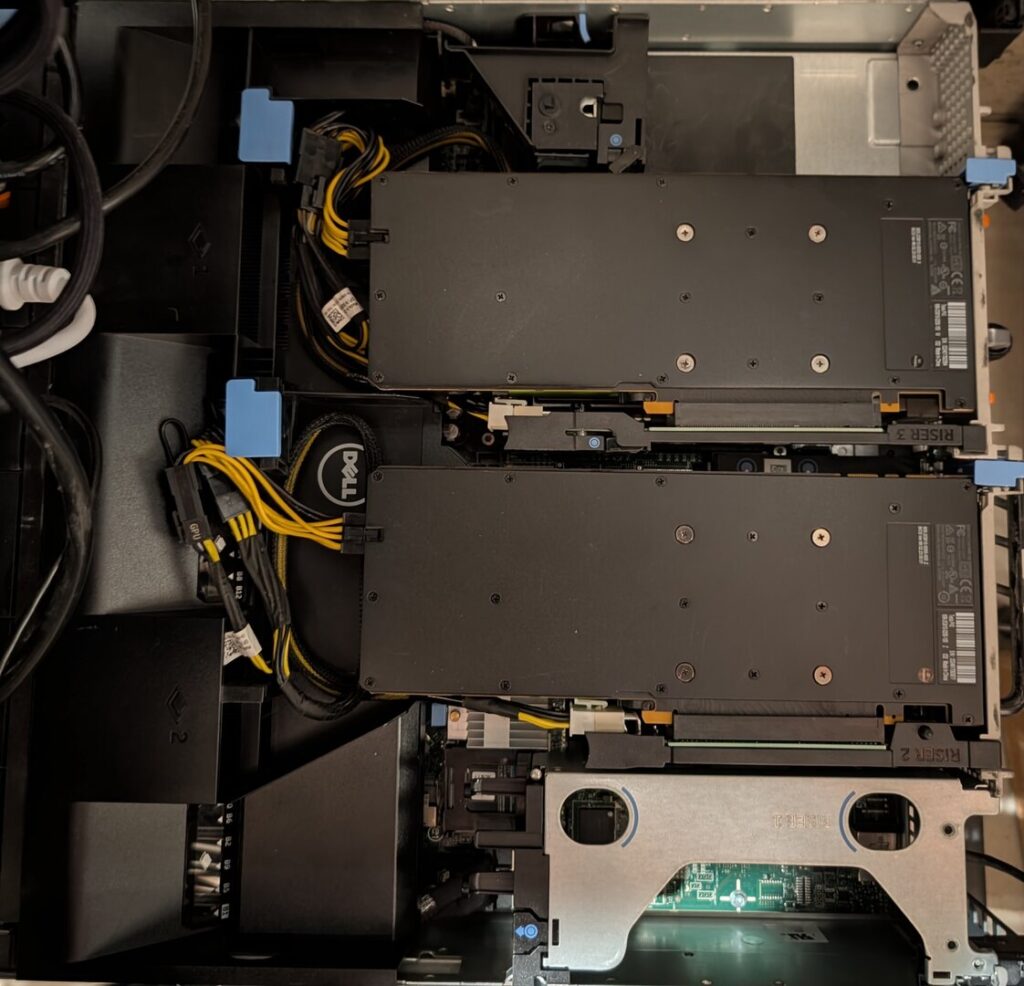
One of the riser cards included with the server had 2 PCI slots with 8x bus so I needed to swap it with a single slot 16x.
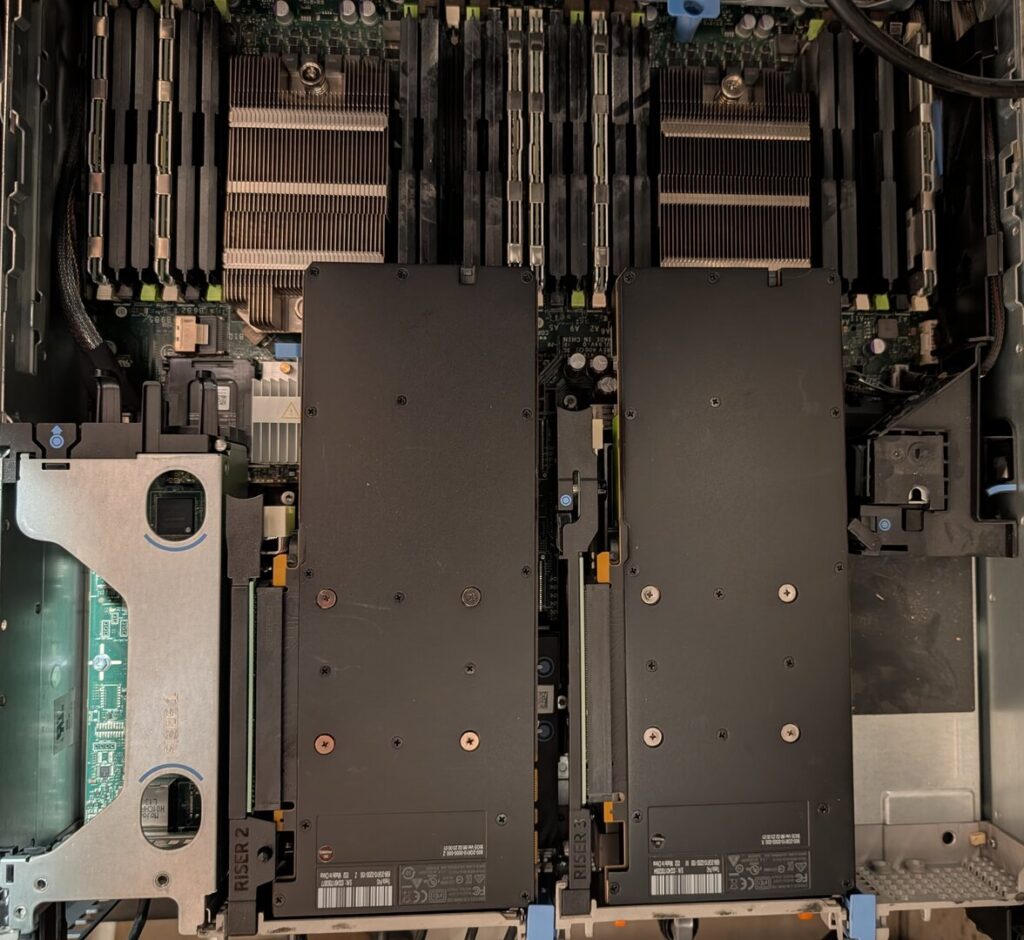
Here are the GPUs seated and then installed in the server. I did get a couple errors on first boot after install. I had knocked loose a stick of ram which I needed to remove and reseat. And the video card installed in the center riser (labeled riser 3 on my server) was not detected, I needed to reseat this as well. This was noted as a common issue.
Notes
All in all, the upgrade cost me around $750. The server was around $250 (I haven’t recently seen a comparable server at that price point). So, assuming some ancillary costs just over $1k I bought the hardware I need for a sovereign AI lab.
Software Config
I have Red Hat [Enterprise Linux] (RHEL) 9 running on my server, this portion assumes that the server is functional running on a linux OS. DNF ommands and package names are specific to RHEL 9 but other distros would be a similar process.
Validating the hardware
Make sure both cards show up
lspci | grep NVIDIA
05:00.0 3D controller: NVIDIA Corporation GP102GL [Tesla P40] (rev a1)
42:00.0 3D controller: NVIDIA Corporation GP102GL [Tesla P40] (rev a1)
Configuring the OS
Tesla p40 drivers are in the nvidia-driver-550 package. For full functionality, drivers, CUDA toolkit setup, and nvidia-utils need to be installed and configured. Also, the fans will run loud by default as a fail safe because the dell server does not recognize the hardware. This is best solved with a script, the commands to view and control the fans are not super straight forward, and really the fan speed needs to be adjusted based on temperature. To take care of all of this I have created a gpukit rpm package with scripts to install the required packages, create a service that can be started on boot to control the fan speed, and a utility to easily check information about the fans and temps. The github repo is here
While this is designed for RHEL9, Dell R720, and Nvidia Tesla P40s, much of this could be quickly adapted to work with other linux distros and/ or hardware. The readme is below explaining the package.
# GPUKit - Dell R720 Dynamic Fan Speed Controller with GPU Support

GPUKit is a comprehensive toolkit for managing Dell PowerEdge R720 servers with NVIDIA GPU support. This will likely work with other dell servers and is designed to work for cards using the nvidia-driver-550 support. This was created with Nvidia Tesla P40 cards. This package provides dynamic fan speed control, GPU monitoring, and automated NVIDIA driver setup.

## Components

### dellfans
Dynamic fan speed controller that automatically adjusts fan speeds based on CPU and GPU temperatures.

**Features:**
- Monitors both CPU and GPU temperatures
- Automatic fan speed adjustment for optimal cooling and minimal noise
- Supports up to 2 NVIDIA GPUs via `nvidia-smi`
- Uses local IPMI for reliable temperature monitoring

**Usage:**
```bash
dellfans [options]
```

Run as a systemd service (see below) for continuous operation.

### dellfans-status
Monitor the current status of the dellfans service and system temperatures.

**Usage:**
```bash
dellfans-status
```

Displays current CPU/GPU temperatures and fan speeds.

### nvidia-rhel-setup
Automated setup script for installing and configuring NVIDIA GPU drivers and utilities on RHEL-based systems.

**Usage:**
```bash
nvidia-rhel-setup
```

Handles driver installation, CUDA toolkit setup, and nvidia-utils configuration.

### dellfans.service
Systemd service file for running dellfans as a background service.

**Starting the service:**
```bash
systemctl start dellfans.service
```

**Enabling on boot:**
```bash
systemctl enable dellfans.service
```

**Checking status:**
```bash
systemctl status dellfans.service
```

## Building the RPM

### Prerequisites

Ensure you have the RPM build tools installed:
```bash
sudo yum install -y rpm-build rpmdevtools
```

### Build Steps

1. **Navigate to the rpmbuild directory:**
   ```bash
   cd gpukit/rpmbuild
   ```

2. **Build the RPM:**
   ```bash
   rpmbuild -ba SOURCES/gpukit.spec
   ```

   Or using the spec file from SPECS directory:
   ```bash
   rpmbuild -ba SPECS/gpukit.spec
   ```

3. **Locate the built RPM:**
   - Binary RPM: `RPMS/noarch/gpukit-1.0-1.el*.noarch.rpm`
   - Source RPM: `SRPMS/gpukit-1.0-1.el*.src.rpm`

### Installation

Once built, install the RPM:
```bash
sudo rpm -ivh RPMS/noarch/gpukit-1.0-1.el*.noarch.rpm
```

Or upgrade if already installed:
```bash
sudo rpm -Uvh RPMS/noarch/gpukit-1.0-1.el*.noarch.rpm
```

## Installation from Source

If you prefer to install without building an RPM:

1. **Install the executables:**
   ```bash
   sudo install -m 0755 rpmbuild/SOURCES/dellfans /usr/sbin/
   sudo install -m 0755 rpmbuild/SOURCES/dellfans-status /usr/sbin/
   sudo install -m 0755 rpmbuild/SOURCES/nvidia-rhel-setup /usr/sbin/
   ```

2. **Install the systemd service:**
   ```bash
   sudo install -m 0644 rpmbuild/SOURCES/dellfans.service /etc/systemd/system/
   sudo systemctl daemon-reload
   ```

3. **Enable and start the service:**
   ```bash
   sudo systemctl enable dellfans.service
   sudo systemctl start dellfans.service
   ```

## Requirements

- **Base OS:** RHEL/CentOS 7 or later
- **Dependencies:**
  - `ipmitool` - for IPMI temperature and fan control
  - `nvidia-utils` - for GPU monitoring (optional but recommended)

Install dependencies:
```bash
sudo yum install -y ipmitool
```

For GPU support, also install:
```bash
sudo yum install -y nvidia-utils
```

Or use the included `nvidia-rhel-setup` script for automated NVIDIA driver installation.

## Configuration

The dellfans service runs automatically after installation. To customize behavior, you may need to edit the script directly or create a configuration file (if implemented).

## Troubleshooting

**Service won't start:**
```bash
systemctl status dellfans.service
journalctl -u dellfans.service -n 50
```

**Temperature monitoring issues:**
- Ensure `ipmitool` is installed and IPMI is enabled on the server
- Check IPMI permissions for the user running the service

**GPU not detected:**
- Run `nvidia-smi` to verify GPU drivers are installed
- Use `nvidia-rhel-setup` script if drivers need to be installed or updated

## License

MIT License

## Support

For issues or contributions, see the project repository at: https://github.com/empthollow/scripts
Leave a Reply